Facebook has launched a new feature that allows users to create avatars of themselves. Similar to Snapchat’s Bitmoji, the Facebook avatar can be used when making comments, Facebook stories and when chatting in the Facebook Messenger app.
This feature was initially tested in 2019 in only Australia but after a successful trial phase, the decision to extend to other users of Facebook. Before you can use this feature, please make sure your Facebook is up to date.
In this article, we are going to show you how to create a Facebook avatar that looks just like you. Unlike Snapchat’s Bitmoji where you needed to download a new app before creating your avatar, the entire avatar creation process takes place in the Facebook app without any additional downloads.
How to create a Facebook Avatar that looks like you
Enough of the plenty talk, let’s jump into the creation process. The steps for creating an avatar that looks just like you on Facebook are:
Open Facebook and tap on the three horizontal bars on the bottom-right corner of your screen
In case you don’t have the app, download the Facebook app from the Google Play Store or the Apple App Store. The Facebook app is free.
Scroll down and select “See More”
Once you click on the three horizontal bar on the bottom-right corner of your Facebook screen, a pop-up menu will show with different options. Some of which include your name and all your Facebook pages.
You need to scroll down to the bottom part of the Menu and select “See More” which comes before “Help & Support.”
Select “Avatars”
After clicking on “See More,” a drop-down menu will show up will fifteen (15) options. All you have to do is to select the second option “Avatars.”
Click on “Next” and then “Get Started”
After selecting the “Avatar” icon, click on “Next” to get started.
Select the skin colour that fits you and then click “Next”
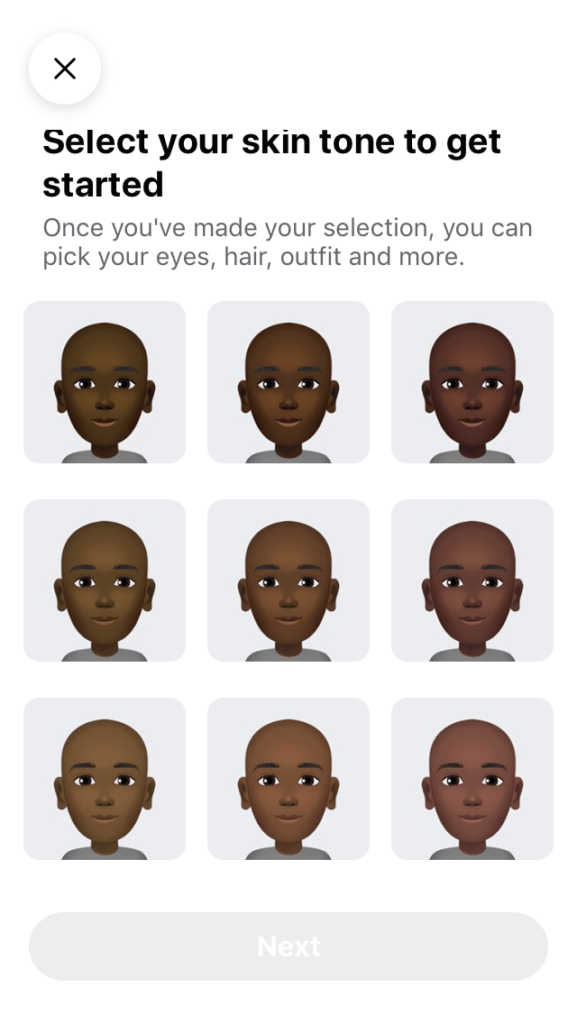
There are 27 skin tone options available for you to choose from depending on the one that fits you best. After selecting your preferred skin tone, click “Next” to continue.
Choose your preferred hairstyle for your avatar and then tap on “Color”
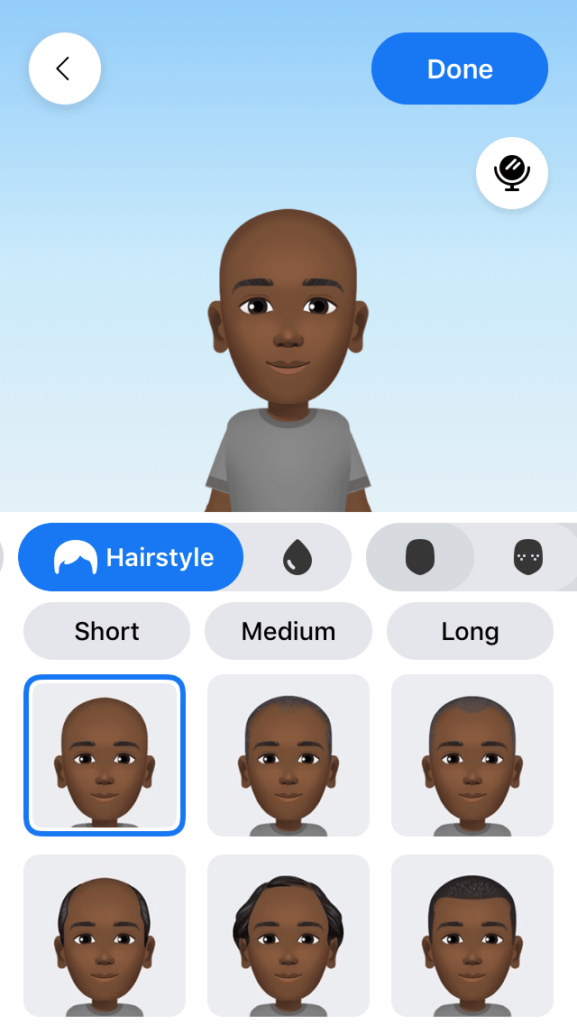
You’ll then be instructed to choose a hairstyle for your avatar. The available options are: Short, Medium or Long with a variety of styles. Upon selection of the hairstyle, then select the colour for the hair.
Select the “Face” of the avatar

This is the most important part of the entire avatar creation process. This is where you choose the face shape, complexion and face lines for the avatar.
Tap on the “Eye” icon and then select the shape and colour of the eyebrow
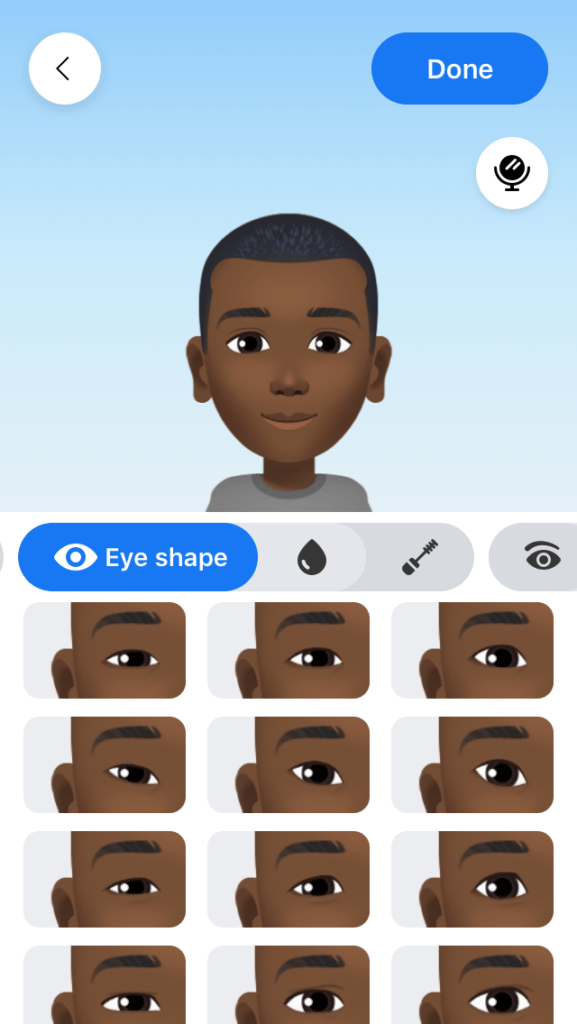
From “Face”, the next step is to select the eye for your avatar. You need to select an eye shape, colour and the length of the eyelash. From there, then move on to the “Eyebrows” icon and select the shape and colour of the brow. Optionally, you can add a spectacle.
Select the Nose and mouth for your avatar
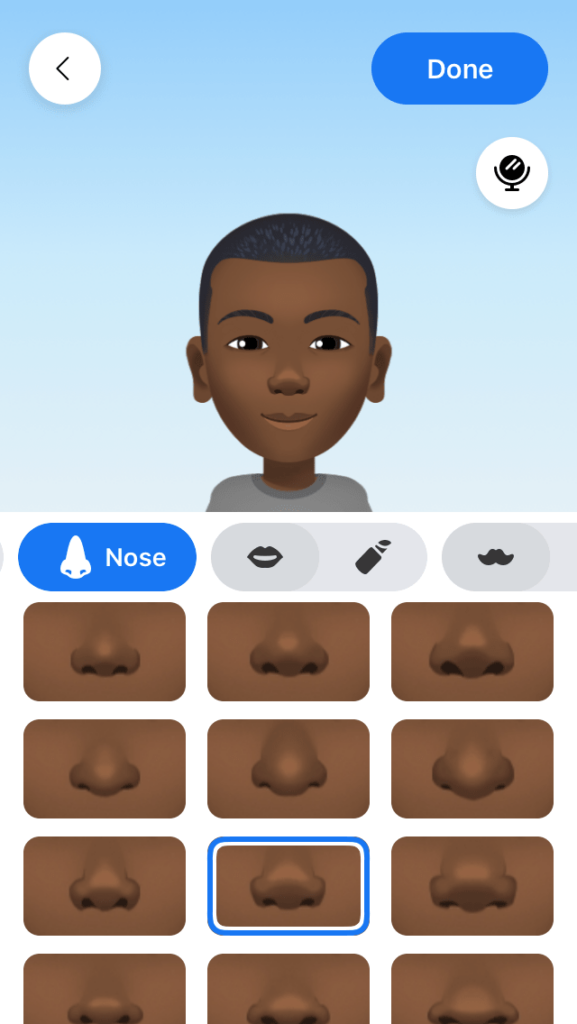
Now, you need to customize the nose and mouth for your avatar. Choose the shape of the nose, then the shape of the mouth. Optionally, you can also add a lip colour and facial hair for your avatar.
Select a body shape and the outfit for your avatar
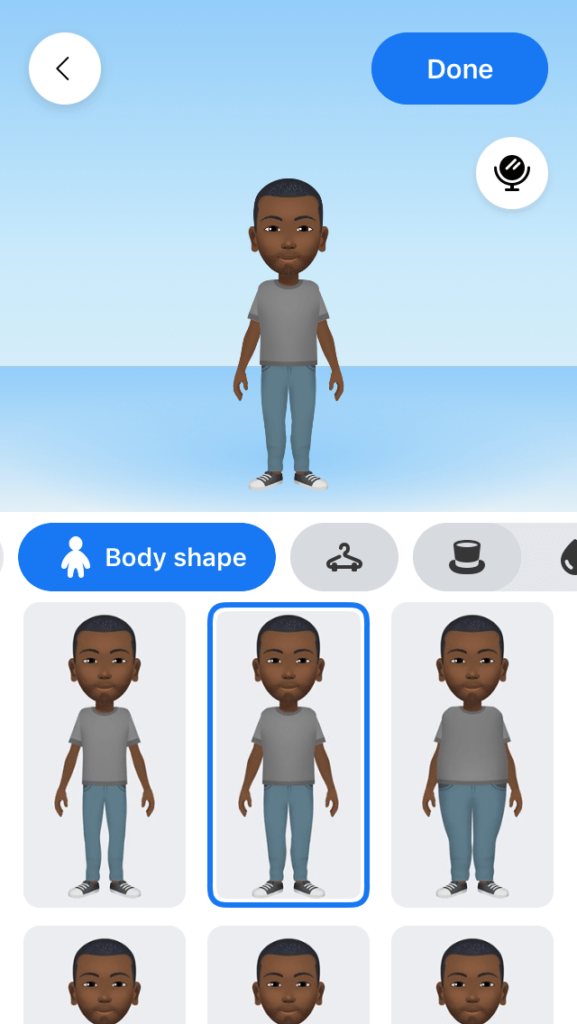
Finally, you need to select the body shape. Upon successful selection of the body shape, you can then choose the outfit you like best for your avatar. Depending on your preference, you can add a hat, scarf or cat ears to the outfit you selected.
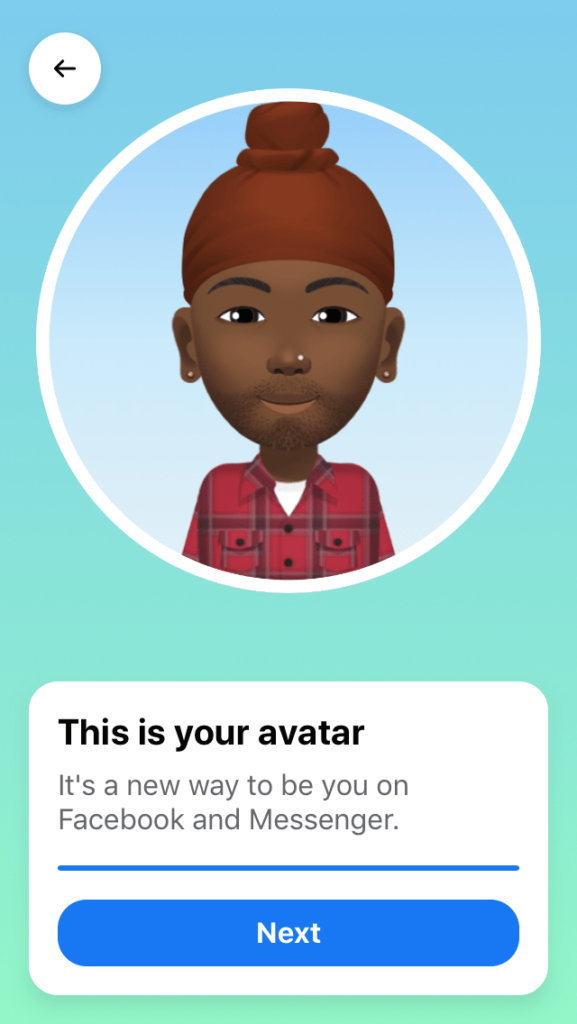
Tap on the “Next” icon and finally “Done”
Once you’re done with the customization, tap on the check icon in the top right corner of the screen, then tap on “Next” and finally “Done.”
Conclusion
Well, that’s it, you’re all set now. You have your unique Facebook avatar that you can share with your friends loved ones on Facebook. To use your avatar when making any comments, just tap on the smiley face icon next to the gif icon.
Finally, make sure to share with your friends on Facebook so that we can all make the most out of this new feature.