How to remove drywall anchors
Drywall anchors provide a strong and stable hold that can be used for hanging anything from heavy shelving units to wall art. Drywall anchors are relatively easy to install, but it is important to know how to remove them properly.
If you have ever tried to hang something on a wall and had it come crashing down, you know how annoying it can be. One way to avoid this is to use drywall anchors to hold the item securely in place. But when you’re ready to remove the anchor, it’s important to do it the right way to avoid damaging the wall.
What are drywall anchors?
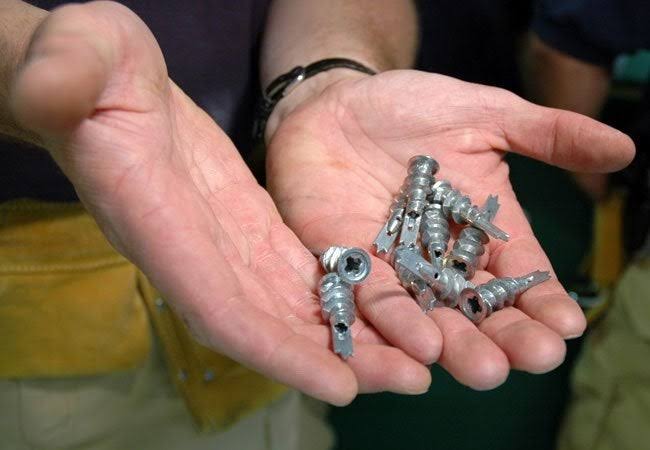
Drywall anchors are an essential tool for securing items to a drywall surface. They come in a variety of shapes and sizes, but all provide a secure fit in the drywall, allowing you to hang heavier objects without damaging the wall. Drywall anchors are typically made of plastic, nylon, or metal and require a screw to be inserted into them to secure the object.
Removing drywall anchors is a common task when carrying out home repair and renovation projects. Whether you need to remove an old anchor that is no longer being used or are simply replacing it with a new one, knowing how to safely and effectively remove a drywall anchor can save you time and energy.
Some tips for removing drywall anchors

Removing drywall anchors is a common task when carrying out home repair and renovation projects. Whether you need to remove an old anchor that is no longer being used or are simply replacing it with a new one, knowing how to safely and effectively remove a drywall anchor can save you time and energy. Here are some tips for removing drywall anchors:
- Start by using a utility knife or other sharp object to cut the drywall anchor’s head away from the wall. This will help ensure that you don’t damage the drywall while removing the anchor.
- Use a pair of pliers to grip the anchor’s body and twist it back and forth until it comes out of the wall. Be sure to wear protective gloves when doing this as the edges of the anchor can be sharp.
- Once the anchor is free from the wall, use a putty knife or other flat tool to scrape away any remaining adhesive or residue left behind.
- Finally, inspect the area around the removed anchor for any damage that may have occurred during the removal process. If needed, fill in any holes or dents with joint compound or spackling before painting over them.
How to remove a drywall anchor
Removing drywall anchors can seem like an intimidating task, but it doesn’t have to be. With the right tools and a little patience, you can easily remove drywall anchors from your walls. First, you’ll need to get the right tools for the job. You’ll need a drill, screwdriver, hammer, and pry bar. Once you have these tools ready, you can begin the process of removing your drywall anchors.
Gather the right tools
Before you start to remove a drywall anchor, make sure you have the right tools for the job. You’ll need a small flat-head screwdriver, a drill with a Phillips-head bit, and a pair of needle-nose pliers.
Locate the anchor
Once you’ve gathered your tools, locate the anchor in the wall. The anchor will be hidden under the drywall and is typically about an inch in diameter.
Remove the anchor
With your flat-head screwdriver, pry up the anchor from the drywall. If the anchor doesn’t come out easily, you may need to use your drill to remove it. Drill into the center of the anchor and then use your needle-nose pliers to pull it out.
Clean up
Once the anchor has been removed, use a putty knife or other tool to smooth out any remaining debris in the hole. Then, fill in the hole with spackle or joint compound, sand it down when it’s dry, and repaint the area to match the rest of the wall.
NB: By following these steps, you can easily and safely remove drywall anchors with minimal effort and stress. With the right tools and a little bit of patience, you’ll be able to successfully remove drywall anchors from your wall in no time.
How to repair drywalls
- Once the anchor has been removed, inspect the area and make sure there is no further damage to the wall.
- Use a utility knife to cut away any jagged edges or pieces of drywall that may remain from the anchor.
- Take a piece of drywall patching compound and spread it over the damaged area with a putty knife. Make sure to spread it evenly and press down firmly.
- Let the patch dry for about 24 hours before painting or wallpapering over it.
NB: By following these steps, you can easily repair drywall after removing drywall anchors. With some patience and the right tools, you can get the job done quickly and efficiently.
Conclusion
Removing drywall anchors can seem like a daunting task, but it is a fairly straightforward process. You will need the right tools, like a drill and screwdriver, and a little patience. Depending on the type of anchor, you may need to use a putty knife or pliers to loosen it before attempting to unscrew it. Once you have the anchor out, you can patch up the hole with some spackle or a special wall repair compound.
Once you’ve successfully removed the drywall anchors, make sure to use new ones when you hang something in your wall. This will help ensure that your picture frames or other items don’t come crashing down in the future. We hope this guide has been helpful and you were able to get those anchors out without too much trouble.