How To Use The “Do Not Disturb” Feature on Android
Does your Android device keep making unnecessary noise from the notifications that keep popping on your device? This noise can be annoying especially when you are at a serious meeting or when you are trying to take a nap or sleep.
There’s no need to worry anymore because, in this article, I am going to show you how to use the “Do Not Disturb” feature on your Android phone and everything you need to know about it.
Most people will say that why don’t you just put your phone on silent and have your peace of mind. Well, yes, that will work but what if there is something important (call or notification) that you are expecting from someone? If that’s the case, then putting your phone on silent will not solve the problem but turning on “do not disturb” is going to solve this problem.
Unlike the silence feature, the “Do Not Disturb” feature allows you to silence your Android device, but also permit certain people and apps on your device to send you notifications; this way, only people and apps allowed by you can send you a notification and the rest will be muted.
What is “Do Not Disturb”?
“Do Not Disturb” is a feature that was introduced in Android 5.0 Lollipop and allows users to partially or completely mute calls and notifications on their Android device. There are three (3) levels of silence you can have control over using the “Do Not Disturb” feature.
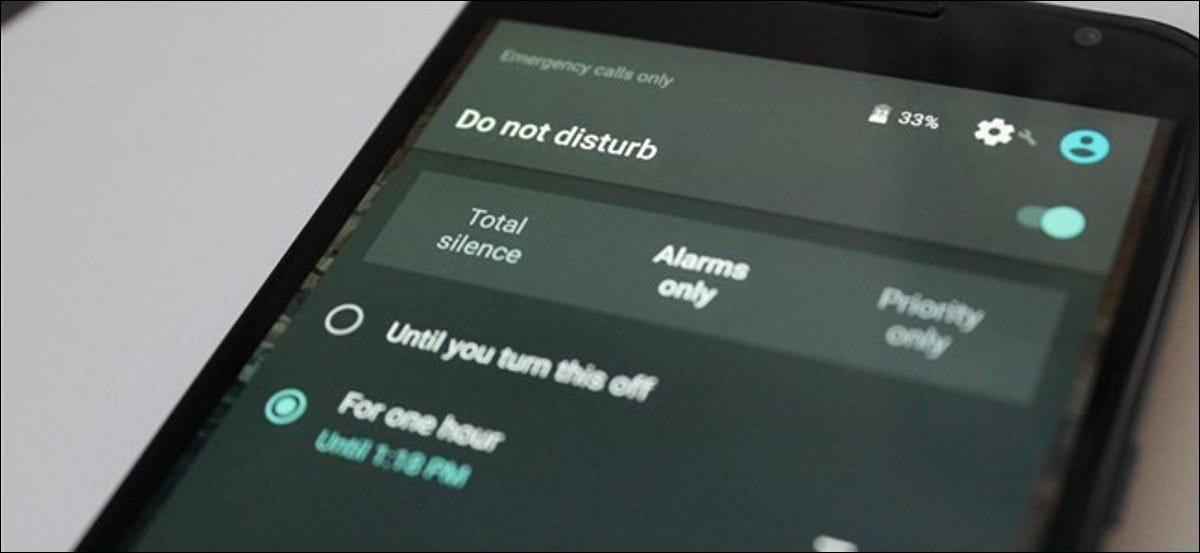
- Total Silence: this feature will completely silence everything, from notifications, calls, and even alarms will not be permitted to disturb you.
- Alarms only: this feature works like the Total Silence feature but with this feature, only alarms are allowed to blow on your Android device.
- Priority only: this feature silences everything except alarms, people, reminders, and events that you choose.
How to Turn On “Do Not Disturb” Feature on Android
There are two (2) main ways you can turn on “Do Not Disturb” on your Android device. You can turn them on manually or automatically.
How To Turn On “Do Not Disturb” Feature on Your Android Device Automatically
- Swipe down the screen from the top of the screen
- Swipe down again (if Do Not Disturb does not appear in the list)
- Tap on Do Not Disturb to turn it on
How To Turn On “Do Not Disturb” Automatically
- Open Settings on your device
- Tap on Sound and then Do Not Disturb >> Automatic rules
- Choose from Weekend, Weeknight, and Event, or choose a new rule. You can name the rule however you want it
- Choose whether you want it to be Alarm only, Priority only, or Total silence
- Tweak the other settings to your preference
Depending on the type of Android device you are using and the Android version you are using, the “Do Not Disturb” feature will be slightly different from the method listed above. But whatever the case may be, the Do Not Disturb feature will be similar to what I stated in the steps above.
What Happens to Missed Calls in the Do Not Disturb Mode?
When you are using the Do Not Disturb, your phone will still be connected to your network provider but depending on the type of DND you have enabled, calls will not be allowed.
Because of this, you would have to manually check your phone to see if someone tried to call you. If that’s the case, then you can call the person back. If your device is on Total Silence, anyone who calls you will not go through, but a missed call notification will pop up on your phone.
Conclusion
Using Do Not Disturb, you can now walk into your meeting or go to sleep without worrying about unnecessary notifications waking you up or disrupting your meeting. Follow the steps listed in this article and you will be good to go.
In case of any challenge, feel free to write it in the comments section below and I will be glad to assist you. Finally, please share this with all your Android device users.