Windows 10 File Sharing Not Working? Here Is How to Fix It
File Sharing is a Windows snap-in feature provides by Microsoft that is designed to facilitate users’ to share files on the same LAN with just a few steps.
However, an increasing number of people complain that they encounter the error of Windows 10 file sharing not working, especially after updating to 1803/1809. So, do you know how to solve the error of Windows 10 file sharing not working? To fix this problem, you can choose to restart your computer, enable file and network sharing, turn off password protected sharing, allow file sharing through Windows Firewall, or share files via other ways, such as trying MiniTool ShadowMaker to share files on other locations or another computer as long as they are on the same LAN.
So, in this post, we will show you how to fix the Windows 10 file sharing not working error.
How to Fix Windows 10 File Sharing Not Working?
Way 1. Restart Your Computer
Some users may doubt this method, but you can indeed try this solution when encountering the Windows 10 file sharing not working issue. And if this method does not take effect, try the following ones.
Way 2. Enable File and Network Sharing
In order to fix the error Windows 10 file sharing not working, you can try enabling File and Network sharing.
Now, here is the tutorial.
- Open Control Panel.
- Choose Network and Sharing Center.
- On the left panel, choose Change advanced sharing settings.
- Then under Private section, check the options Turn on network discovery and Turn on file and printer sharing.

- After that, right-click the items you want to share and choose Properties. Then go to the Sharing tab and click Advanced Sharing. Next, check the Share this folder option and click Apply and OK. Besides, you can change its permissions.
Once all steps are finished, check whether the error of Windows 10 file sharing not working is fixed.
Way 3. Turn Off Password Protected Sharing
When Password protected sharing feature is enabled, then other users either need to have a user account on your PC or they should be familiar with your username and password. So, if they are not, they would come across the Windows 10 file sharing not working error. Hence, you can try turning off password protected sharing.
Now, here is the tutorial.
- Open Control Panel.
- Choose Network and Sharing Center.
- On the left panel, choose Change advanced sharing settings.
- Then expand the All Networks.
- Scroll down to find the Password protected sharing.
- Then check the option Turn off password protected sharing.
- At last, click Save changes.
Once all steps are finished, check whether the error Windows 10 file sharing not working is solved.
Way 4. Allow File Sharing Through Windows Firewall
If the File and Printer feature is disabled in Windows Firewall, you may also come across the error of Windows 10 file sharing not working. In this situation, you need to allow file sharing through Windows Firewall.
Now, here is the tutorial.
- Open Control Panel.
- Then choose Windows Defender Firewall.
- In the pop-up window, choose Allow an app feature through Windows Defender Firewall.
- Then choose Change settings.
- Scroll down to find File and Printer Sharing and check it.
- Then tick it under the Public tab.
- At last, click OK to save the changes.

Once all steps are completed, check whether the error of Windows 10 file sharing not working is fixed.
Top Recommendation – Share Files via Another Way
When the Windows 10 file sharing is not working, other users will fail to access the files in the shared folder on your computer. So, you can try another way to share files.
In this situation, you can choose to transfer files to an external device so that everyone can access it or you can choose to send the files to the shared folder on their computer. To achieve that, MiniTool ShadowMaker is competent. It is a piece of file sync software, allowing you to send the files to an external device or send the files to another shared folder with quick.
MiniTool Software company has been developing innovative, professional partition management software, data backup utilities and data recovery solutions for users from 180+ countries and areas for over 10 years. Their software products have got featured by a lot of authoritative tech news sites such as TechRadar, LifeHacker, PCWorld, CNET, FileHorse, TechAdvisor, Softpedia, etc.
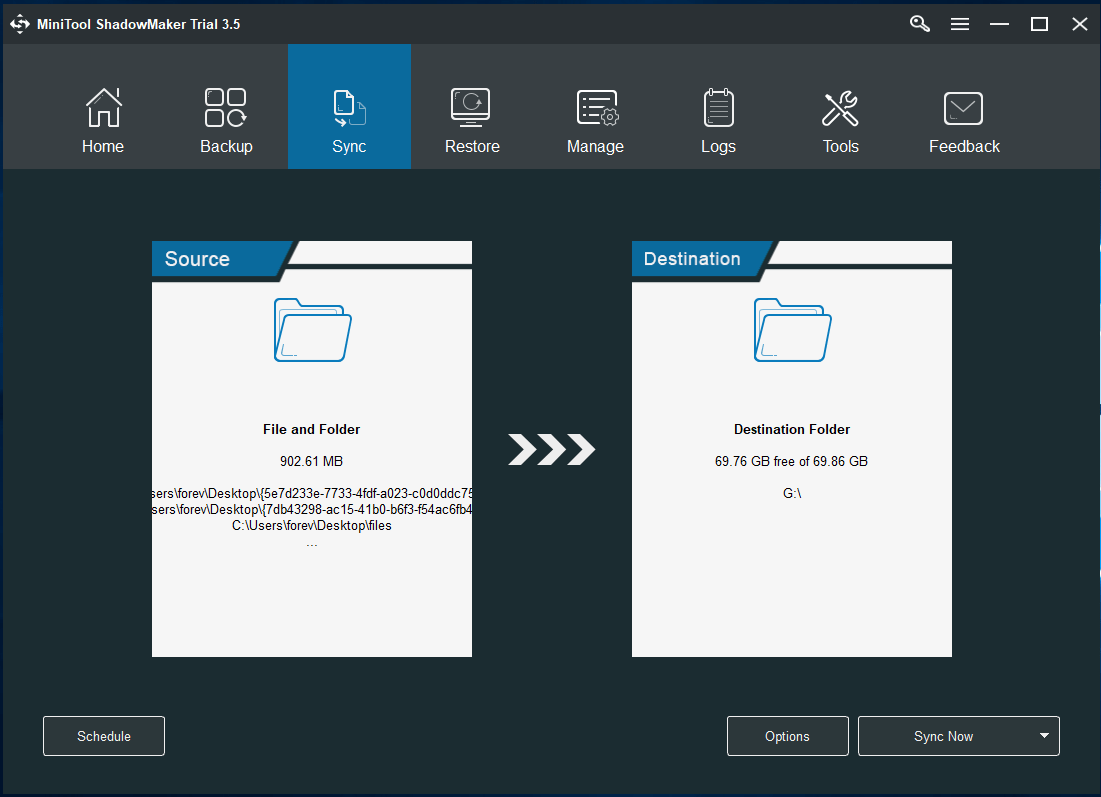
Here we will show you how to share files with MiniTool ShadowMaker.
- Launch MiniTool ShadowMaker.
- Then go to the Sync page.
- Click Source module to select the files you want to share or sync to another location. You can select a lot of files at a time.
- Then click Destination to choose a target disk. You can choose a portable device. Also, you can choose a shared folder. If you choose a shared folder, you should type the path, username and password.
- After that, click Sync Now to continue.
Once all steps are finished, you have successfully synced files to the portable device. Then connect the device to another computer and other users are able to access it.
A big difference between Sync feature of MiniTool ShadowMaker and Copy and Paste feature is that the Sync feature enables you to transfer files with fast speed even though they are large files. If there is not available portable device, you can choose to sync files to the shared folder.
As for how to fix Windows 10 file sharing not working issue, this post has shown several solutions. In order to share files with other people, you can also try MiniTool ShadowMaker. It allows you to sync files to different locations and sync large files and folders with lighting speed.