The increased use of Apple devices especially, iPhones has led to huge numbers in the use of Apple’s data transfer tools, like iTunes and iCloud. In 2019, Apple announced that there are about 1.3 billion active iOS devices in the world.
Due to some one or two things, you might need to change the iCloud account on your iPhone. But the process of changing your iCloud account though simple can be very “tricky” if not done well.
I once tried to change the iCloud account on my iPhone and ended up doing something else; not because I didn’t know what to do but I didn’t follow the steps very well.
Your iCloud account is your gateway to everything on your iPhone and without it, there’s nothing you can do on it. An iCloud account just works similarly to Google account on Android phones.
Before you change your iCloud account, you need to log out of everywhere you have logged in using that particular iCloud account. This might include your iPad, iPod, and all other Apple devices.
How to Change iCloud Account on Your iPhone
The steps for changing your iCloud account on your iPhone are very simple and easy and can be done in less than 10 minutes depending on the strength of your internet.
The steps for changing the iCloud account on your iPhone involves 2 major stages and they are:
Sign Out of Your current iCloud Account
This is where you remove the existing iCloud account from your iPhone. Here too there are some few processes and they are:
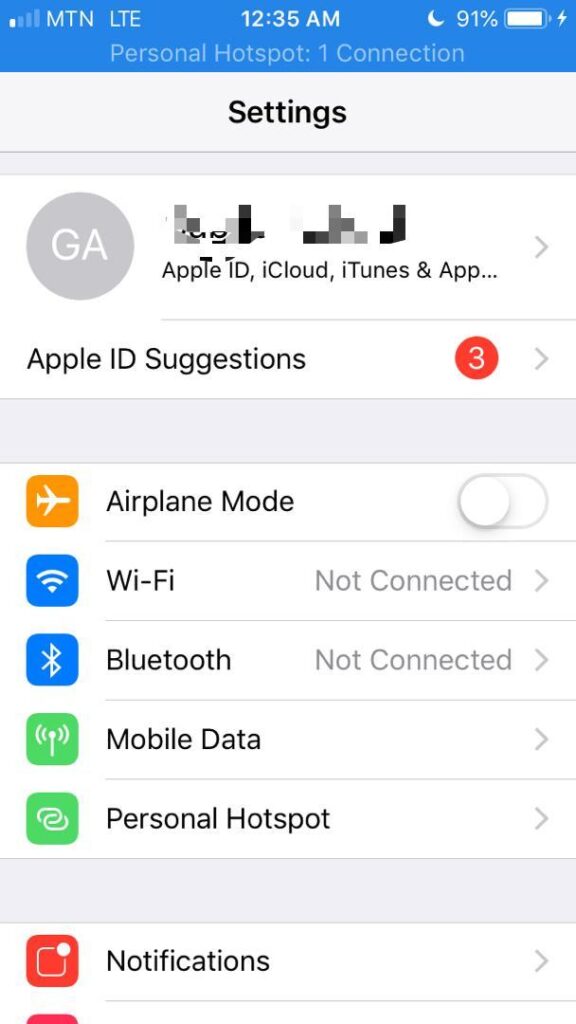
Open the Settings app
The Settings app is the most important app on your iPhone because this is where you make every change to your phone. Therefore, can only change your iCloud account on your iPhone from here.

Tap on your name at the top of the sidebar
This will open the Apple ID account page, this includes your iCloud, iTunes, App Store, and Family Sharing information. From here, you can also see a list of the devices on your account.
Scroll down and tap on Sign Out
After clicking on this option depending on your default settings, you will be asked to enter the password for the iCloud account you’re removing.
Select whether to keep a copy of your data or not.
After entering your password for the selected iCloud account, a pop-up will show with the inscription, “Keep a copy of your data on this iPhone?” you can choose to keep a copy of your Contacts, Calendars, Safari pages and data of other apps.
Tap on “Sign Out”
Now that you have chosen the data to save on your iPhone and the ones to delete, you can then tap on the blue “Sign Out” inscription on the right-hand corner of the pop-up.
Confirm “Sign Out”
Once you click on “Sign Out”, another pop-up will show asking you are sure of signing out. All you need to do is to tap on the red “Sign Out” option next to “Cancel.”
Depending on your internet connectivity, it can take some few minutes for your iPhone to finish removing all of your iCloud data from your iPhone.
Sign In to Your New iCloud Account
After signing out of your old iCloud account, you need to log in to your new iCloud account and if you don’t have one too you can create a new one.
- Go to Settings
- Tap on “Sign in to your iPhone” and the top of the sidebar
- Enter your new Apple ID and password
- Enter the confirmation code sent to the other device signed in with your account (if any)
- Enter your iPhone’s passcode if you have one
Also depending on your internet connectivity, it may take a few minutes for all the data on the iCloud account to be transferred to your iPhone. For example, contacts, photos, etc.
Once you sign in, your account will be automatically linked to iTunes and the App Store.
Conclusion
The main things discussed in this article are how to change iCloud on your iPhone and this involves two main stages; signing out of the old account and signing into your new account.
I hope you find this useful and it serves its purpose for which it was published. And always feel free to drop your comments and your suggestions in the comment section below.


